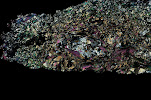
For Kim, a photo of the Tasmanian whiteschist. It is located along the Collingwood River, just up from its intersection with Scarlet Creek. It is the resistant stuff surrounding the water (and cobble) filled hollow.
Some terms used in last post (feel free to skip down to the ones which interest you, some of the explanations are wordy!):
BSE photo. A back-scatter-electron image (in this case taken on a scanning electron microprobe). In this sort of photo the relative levels of brightness or darkness communicates information as to the composition of the minerals in the photo. The brightest areas correspond to areas with heavy elements, and the darkest areas correspond to areas containing light elements (and the in-between shades, oddly enough, to areas which are in between). Therefore monazite, which contains uranium (U), thorium (Th), and lead (Pb) (amongst other stuff), which are all well along on the periodic table (and so heavy) comes out a nice, bright white, quartz, which is (mostly) just silicon (Si) and oxygen (O) (both nice and early in the periodic table, and so light) is such a dark grey it is bordering on black, and the garnet, which contains iron (Fe), magnesium (Mg) (and other stuff) in addition to Si and aluminum (Al) averages out to somewhere in between, and is the medium grey shade. I can see at least two other shades of grey in that photo, and while I didn’t happen to analyze those minerals, I could guess that they are apatite and a titanium oxide. This guess is made because those are common in other samples from this area and look about like that in the BSE images from the samples wherein I did analyze them. However, when doing BSE images the only safe time to compare the shades of grey to determine which mineral is which is when both images are set to the same level of contrast. It is common to search for monazite with the contrast set such that almost everything on the screen is black, save the monazite and zircon. Therefore just because I remember those minerals being that shade of grey doesn’t guarantee that I’ve correctly identified them.
High levels of Y: Although not a primary ingredient in monazite or garnet, the element yttrium (Y) occurs in both minerals to a limited extent. Both of these minerals like Y better than do the other minerals in a metapelite, and so whatever Y is available in a rock is likely to be found in one or both of them. However, garnet is (usually) much larger than monazite; therefore it is able to take up more Y by virtue of having more room for it. As a result many workers consider changes in the amount of Y in monazite to be an indicator of what was happening with the garnet in that sample. When both garnet and monazite are growing at the same time the garnet hogs the Y, leaving the monazite to be low in Y. When garnet is breaking down whilst monazite is growing the Y that had been stored in the garnet becomes available for the monazite, and it winds up with higher levels of Y (there are, of course, several other possible scenarios).
Inclusion: when one mineral grows fast enough to surround (an)other mineral(s) the surrounded grains are said to be “inclusions”. When this happens we know that the included mineral must have already existed at the time it was surrounded, and therefore we have learned something about the order in which the minerals crystallized. (note: when one mineral is included within another it could be because mineral A grew first and quit growing, then mineral B started growing and eventually surrounded it, or it could be because they were growing at the same time but mineral B grew so much faster that it managed to surround A. Therefore, while we know that the one existed before it got surrounded, we don’t necessarily know if it was old or new when it happened).
Metapelites: metamorphic rocks which were comprised of mud before they were metamorphosed. They tend to be high in Si and Al and common minerals in metapelites include quartz, feldspar, mica (biotite and/or muscovite or other micas), garnet, kyanite, and, as an accessory mineral, monazite.
Monazite generation: Monazite is able to grow under a variety of conditions, and from a variety of metamorphic reactions. In areas which have seen multiple episodes of deformation it is not uncommon for there to be more than one generation of monazite. Sometimes a single monazite grain contains zones from different generations, and each zone will give a different calculated age, and often, have a noticeably different chemical composition from the other zone(s).
Monazite: Monazite is a rare-earth phosphate with the general formula of (Ce, La, Th)PO4. It is very common in metamorphic rocks, particularly metapelites (used to be mud). It is often used for chemical U-Th-Pb dating wherein the concentrations of those three elements are measured and calculations done to work out how much lead has been created by the radioactive decay of the U and Th, and therefore how much time has elapsed (since the half-life of U and Th are known, it is possible to figure out how long it would have taken to make that much lead from those minerals, assuming no starting lead was present in the mineral). Monazite tends to be an “accessory” mineral, which means that it is rarely more than 1% of the total rock, and is often quite tiny. So long as it is at least 10 microns in diameter, it is large enough to do the analysis needed for dating (remember there are 1000 microns in every millimeter). Some of my monazites are more than 100 microns in length, and some are even bigger. The large ones can be seen without using a hand-lens or microscope, especially because if they happen to be surrounded by biotite (a brown mineral which is also common in metamorphic rocks) there is usually a darker discoloured “halo” around the monazite due to damage to the biotite crystal lattice as the radioactive elements in the monazite decay.
Whiteschist: a fairly unusual metamorphic rock which contains talc and garnet and other minerals. It is very high in magnesium compared to other sorts of metamorphic rocks (which is part of why it contains talc) and its garnet tends to be higher in Mg than is normal for garnets in metapelites. It is thought to form under rather high pressure.
~~~~~~~~~~~~~~~~~~~~~~
So there you have it, a brief glossary to help you understand my last post. Let me know if I missed anything I should have defined, or if you want a reading list of sources for any of the above information (I typed it up off the top of my head, but I can find the sources I’ve sited in my in-progress thesis if anyone wants to see them).
Those of you who have been paying attention may not need them pointed out, but the main reasons I’ve asked for comments from others are 1) it is not common to see so much monazite all together in one location like that, so thoughts of what could have been there before the monazite grew to cause the concentration are appreciated 2) the pattern of high Y/low Y monazite grains established in the rest of the sample is quite different than occurs in this cluster, so thoughts of why it is different are appreciated. It is quite likely that the answers to 1) and 2) are related!


I've had some thoughts about this cluster and its implications for this sample, but I would welcome hearing what others have to say about it.
There comes a time in the life of most graduate students when one’s funding is about to expire, but one’s writing is not yet complete. When faced with this situation we students take a variety of options. Some choose to seek additional funding, some seek employment, and others of us seek options which negate the problems entailed by lack of funding. Each of these has their advantages and their pitfalls. For those of us enrolled in an Australian University the end of funding deadline appears much sooner than we might like in that the official time limit is three years from start to finish of a PhD program (note: Australian PhD students do not enroll in courses—rather it is a research based degree program). Those of us who can demonstrate complications or interruptions to our progress which were outside of our control can often obtain an additional six months of funding, but the university is pretty clear that it doesn’t wish to extend funding beyond that point.
Some of my cohorts choose to obtain employment at that point, with the intention of completing the write-up of their results in their “spare” time in the evenings and on the weekends. Some of them manage this goal, but it seems to extend the process by many more months than they would have liked. I am one of the fortunate few to have another alternative. When my Master’s funding ran out years ago, I moved in with my mother & step father and enjoyed free room and board in exchange for some basic housework and managed to complete my thesis in only one more semester’s worth of time. Now that my PhD scholarship has ended my own mother’s home is no longer an option, as she lives on another continent. However, my husband’s parents are local and have a spare room and have made us welcome in their home.
The process of packing up and moving all of our belongings, some for storage until I complete my degree, find employment in academia, and move to our new location, and some to be kept out and available in our room in their home and the final cleaning of our rental house, has cost me fully 12 days wherein I could have been working on completing my degree. However, it is my hope that by thus avoiding a major time commitment, such as a full time job, I shall be able to complete my writing and submit my thesis (note: in Australia both Master’s and PhD students write a “thesis”) within the next month or two.
Another way we can be kind to our future self is to distribute our work evenly, and not procrastinate until facing a hard deadline with too much work still needing to be done. This one can take years of practice to get right. When first starting out in graduate school it can be very tempting to translate the freedom of setting one’s own schedule into “I can take any time off that I want to take”, but students who take this approach often regret it later in their project, as their scholarships are running out, and the work isn’t yet done. I know that I tried to make the effort early in my project to work steadily, so that I’d have the same level of work-load throughout, but I’m not certain I managed as well as I might have, if I had only known more then about what I would need to have done by now. The end is in sight, but the effort being put forth does, at times, seem to have been exponential in its increase. Fortunately, even when one wasn’t perfect in distributing the work-level across the entire project, still projects are finite in duration, and the effort I’m putting in now will make life easier for my future self.
I'm taking this one from Silver Fox, who tagged these five categories of people: 1. Any geologist, 2. Anyone who has driven the Alcan, in either direction, 3. Anyone who has lived north of the Arctic Circle, 4. Anyone who hates moving, 5. Anyone who considers themselves an artist. I wasn’t going to do this, but I happen to fall in four of the five categories (I love moving!), so I took it as a sign that I should participate.
5 things I was doing 10 years ago:
(Let's see, 10 years ago was 1998.)
1. Completing my Master’s Degree.
2. Deciding to move to Kotzebue, Alaska (north of the Arctic Circle).
3. Lost my father to cancer.
4. Frequent Contra Dancing.
5. Reading lots of science fiction/fantasy novels (but this one applies to nearly every decade I’ve been alive)
5 things on my to-do list today:
1. work on my thesis
2. do some laundry
3. work on my thesis
4. eat some food
5. work on my thesis
and did I mention that I need to be finishing up my thesis?5 snacks I love:
1. Fresh bread, straight out of the oven, with real butter.
2. Fresh raspberries (only one more month till they are in season!)
3. Mild cheese, esp. ricotta.
4. Salad made with fresh spinach, cucumber, avocado, grated carrot, tomato, sunflower seeds, flax seeds, sprouts, and a sprinkle of “tasty nutritional yeast”.
5. Home-made cake batter or cookie dough made with real butter, fresh eggs, and less sugar than most recipes call for (yah, kind of weird for a metamorphic petrologist to not want to ruin a perfectly good cookie by putting it in the oven, but there you go)
5 things I would do if I was a millionaire:
1. Build myself a small stone “castle” (probably only a tower keep), using six different pretty metamorphic rock types, spiralling them up the tower to give a barber-pole like effect with the change in rock types from one section to another.
2. Travel more.
3. Fund a scholarship for students interested in studying geology who otherwise wouldn’t be able to afford to go to Uni.
4. Learn to parasail—just think all the fun of climbing the mountain, without the wear and tear on the knees for the hike back down.
5. Fund my own research instead of needing to apply for grants.
More than 5 places I've lived:
1. Japan.
2. Germany.
3. Crete.
4. Several of the “lower 48” states.
5. Alaska.
6. British Columbia.
7. Tasmania.
5 jobs I've had
1. Baker.
2. Teaching geo labs.
3. Book Store clerk.
4. Massage therapist.
5. Graduate Research.
5 rocks I love:
(For geologists or any others who also want to add rocks.)
1. Garnet phoroblast schists.
2. Anything with nice large, pretty, igneous or metamorphic crystals
3. Rocks displaying crenulation cleavage
4. Rocks displaying flow banding
5. Mylonites
5 categories of people I'll tag (because I hit only four of Silver Fox’s five, I thought I’d pick five that apply to me, just to see if any of you manage them all, but only one is sufficient to play…):
1. Anyone who has lived in more than one country.
2. Anyone who likes deformed rocks.
3. Anyone with a love of mountains.
4. Anyone who loves moving.
5. Anyone who appreciates the art/beauty in science.
I recently encountered one of those surveys which wend their way around the internet and seem to serve little purpose, save offering us diversion from whatever it is that we are meant to be doing, and, betimes, giving us some insight into the manner in which we are similar to or different from those of our friends who have also answered the questions. This particular survey was on the topic of “fashion”. I, like many other geologists, am not terribly “fashion conscious”, preferring “comfort” over style, and I made the decision as a very young person that, unless I happened to be on stage for some reason, to never wear makeup. Therefore I found it appalling to read the answers some of my friends gave to the question inquiring as to their “beauty routine”. What is it that causes some people to equate “beauty” with slathering their faces with expensive goos? I nearly avoided the entire survey as a result of my reaction.
However, I then thought about it a bit more asking myself, do I, a sensible geologist with a “natural” look, have a “beauty routine”? It turns out that I do, so I thought I would share my secrets with you, so you can all be as beautiful as I.
* Maintain a positive attitude/outlook on life
* Smile often
* Refrain from gossip
* Stay out of the direct sunlight as a general rule (wear hats in the field!)
* Get plenty of exercise; do more than 20 minutes of yoga every day.
* Eat a healthy diet in moderate quantities; eat fresh vegetables, fruit and a variety of grains, nuts & seeds
*Whenever possible, eat only home-made items; avoid processed and commercially manufactured "foods".
* Shower regularly.
* Keep hair long, clean and tangle-free (braids are useful here!)
Given the level of shock one of my fellow PhD students expressed when she discovered my age the other day (I’m nearly twice her age); I think my routine is working.
If one happens to be working with a rock wherein all of the minerals are homogeneous the use of this program to work out temperature and pressure at which it probably formed is very straight forward. Simply enter in the composition of the rock, let it do the calculations, look at the resultant graph, and find the place on the graph wherein the list of minerals predicted matches those actually present. However, it is rarely this easy. Many minerals, particularly garnet, are zoned. This means that their composition changes over time, becoming richer in some elements and poorer in others. In these cases what one reads off of the chart from the calculations is the combination of minerals present at that point in time when the first zoned mineral started to grow, and further calculations are needed to determine what the changes to the whole-rock composition will be as a result of the garnet growth locking some of the ingredients away in the center of the crystal.
One of the samples I’ve been working on has been a major source of frustration for me. It happens to come from the highest-grade metamorphic region in the state, and as a result some of the garnets present are up to 2 cm in diameter. Because of the sheer size of these grains and the significance of the location it was one of the first samples upon which I attempted the Perple_X calculations. Alas, it also turns out to be one of the most difficult samples to model, with a variety of different complications interacting to prevent me from getting good results.
When I mentioned above using the whole-rock composition of the sample for the calculations, I neglected to mention that there are some corrections one needs to make to the measured composition before using the numbers. One of these is to convert the reported Fe2O3 into FeO, since FeO is the form that is used for the calculations. The whole-rock analysis doesn’t actually have a way to distinguish between the two valence states of iron, so one has to make an educated guess as to how much is really Fe2+ and how much Fe3+. For my samples the “standard” correction was to assume that 90% of the iron measured was FeO. However, with this specific sample when the calculations were complete it turned out that given the starting ingredients the program thinks that it simply isn’t possible to form garnet with as much iron in the core as this sample has.
Another correction is to account for the element phosphorous, which is measured when doing the whole-rock analysis, but is not on the above list of ingredients the program considers. One of the most common minerals to contain phosphorous is apatite, which occurs in very tiny amounts in most pelitic schists. One of its other major ingredients is calcium. If one assumes that all of the phosphorous in the rock happens to be in the apatite, that would also mean that a proportional amount of calcium was tied up in the apatite and so unavailable for use in other minerals. Therefore another “standard” correction I’ve been doing is to subtract enough CaO from the whole rock-composition to account for the measured P2O5 being locked up in apatite. Alas, this sample is low enough in CaO that doing this correction results in problems with predicting the calcium content of the garnet.
Another factor with this sample which may be quite significant is that this sample contains tourmaline. Tourmaline is not one of the minerals normally included in the solution set used with Perple_X, in part because it is a very complex mineral in terms of its crystalline structure, and in part because it is one of the few "commonly" occurring minerals to contain the element boron, which is not normally included in the list of ingredients used in the calculations, since it isn’t included in very many minerals. However, reasonable early on in my project, when I was first encountering difficulties with modelling this sample, I stumbled upon a paper wherein they expanded the list of solution models for Perple_X to include B2O3 and the various end-members of tourmaline. So I e-mailed the authors, got a copy of their expanded solution set and gave it a try.
After many attempts doing various calculations for this sample, trying various combinations of “standard correction” for iron, trying again with the assumption that *all* of the iron measured was FeO, rather than just 90% of it, the “standard” correction for CaO, and again assuming that only 90% of the Ca needed to account for the phosphorous in apatite was present, and trying all of the above with and without the tourmaline present in the solution set I finally found a combination (more FeO and CaO than “standard” and consider tourmaline) that came the closest to predicting the composition of the core of this garnet. Not a perfect match, since it *still* thought that my sample has more iron in the core than is possible, but it was the best I could manage, and I’d already spent too much time trying to make this sample “work”. So I gave up and called it “good enough”, and attempted to do the next step with the calculations for garnet fractionation.
Alas, no mater what changes to pressure and temperature I set for the calculations, in every attempt the program decided that there wasn’t enough CaO—each time it would run out of that ingredient and crash long before predicting garnet with as much calcium as mine has in the rims (all of my garnets start out with only a little calcium in the cores, and increase towards the rims—sometimes it is as high as five times as much calcium in the rims than I the cores).
While it is, in theory, possible to work around that crash by starting the calculations over at the point just before it crashed, but removing CaO from the list of ingredients considered, attempts at this work-around didn’t succeed in predicting garnet which matches the other ingredients measured in my sample. Eventually I wrote a number of paragraphs explaining the manner in which this sample wasn’t working and moved on to other samples.
However, it always nagged on me that this particular sample, of all of them, didn’t “work”. During the past few weeks I’ve been doing repeat modelling for other samples which did “work” in that they predicted a reasonable match to the composition of garnet, but, unfortunately, also predicted the presence of paragonite, a mineral which does not actually occur in my samples. Since paragonite is a mica, and micas contain a component of H2O, one change which can be made to the calculations is to limit the amount of H2O available to the calculations. Doing this turned out to not only convince the program to quit suggesting paragonite; it also caused the “reasonable match” to the garnet composition to turn into an even closer match, which made me happier with the results I am getting.
Now that I’ve got so many different attempts for each sample, I decided to create a spreadsheet which chronicles for each sample which settings were used for each attempt, what temperature and pressure was predicted, what level of accuracy was achieved in matching the garnet composition, and how much of which other minerals are predicted to be present at those conditions. Looking at these results organized into a table in this manner showed me patterns in the results for different initial settings, which in turn helped me to decide which samples might also benefit from additional calculations, and which settings to use for those attempts.
Finally, this week, I got down to the point wherein I had usable results for everything, save for that one, high-grade sample with the large garnets. Remembering the frustrations I had trying to make this sample work back when I was just learning to use the program, I almost left it be. Did I *really* want to revisit that sample and court the same levels of annoyance when it didn’t work? However, I realized that if I *didn’t* try, I would always regret it—I had changed everything else with this sample, but never tried modifying the amount of H2O. In the interest of being complete, I had to make the time. Never mind that I was actually meant to “complete the thermodynamic modelling” stage of my project months ago, it had to be done.
So I sat down, opened the file, made the adjustments and set the program going. Whilst it did the calculations I prepared and named the new folders needed to keep the results organized and separate from all of the other calculations done for this sample, and got my drawing program set up to display the results. The calculations finished, and with some trepidation I begun the process of creating the various graphs to see the results. Lo and behold, for the first time ever, the program predicted that *is* possible to create garnet with that much iron in it! And, better yet, there is a point wherein the garnet is a near-perfect match for that measured in my garnet core. There was much rejoicing as I collected the data and added it to the appropriate spreadsheets. Yet, there was still a component of dread. Yes, I’ve managed to model the garnet core, but what about the garnet fraction calculations? Do I really want to try them and watch the program crash again when it runs out of CaO?
I must admit that I did wimp out the first evening—rather than trying the calculations straight away once everything was done for the core calculations, I called it a night, did my yoga and went to bed. It wasn’t until the next morning that I managed work up the courage needed to try the fractionation calculations. You can only imagine my joy when the first attempt not only didn’t run out of CaO, but actually got somewhat close to a decent match for my garnet rims. It took only two other attempts, one at a slightly steeper slope, and one in between the two, to come up with a good match. For the first time in the two years since I first obtained this program and started trying to model this sample, I finally have results for it! Better yet, this was the last sample to be complete for this region; I can now devote all of my energies into writing up the thesis, rather than doing calculations which should have been complete ages ago!

Thanks to modern social networking web pages I have recently gotten back into contact with old friends from high school with whom I’d lost touch due to frequent moves in a pre-internet era. During our obligatory “what have you been up to for the past couple of decades” exchange of notes I’d described myself as “enjoying life as a PhD student”. This caused one of them to enquire if I had been under the influence when I wrote that, because by the time she’d reached the final write-up for her PhD she was so sick of the project that she was considering something more pleasant, like tearing out her eyes. This exchange brought to mind the advice I’ve heard often for people considering doing a PhD “pick something you love, because you are going to hate it by the end of the project”.
Why? What is it about our system of “higher education” which makes people think that we should hate it? I’ve met some people whose approach to life is to choose to do only things they enjoy; others of us choose to enjoy whatever we do. To my mind, there is no better thing I could be doing with my life than learning and/or sharing knowledge. Why am I enjoying life as a PhD student? In part because my schedule is my own—there is no employer standing over my shoulder saying “you must be at work between the hours of 9 and 5”. If I happen to feel like working at midnight, I do. If I happen to feel like working at 07:00, I do. I am free to set my own schedule, and to make it as random, or as consistent as inspiration makes it. This is a wonderful feeling. I may have a lot to do, but I am the one to decide when to do it.
I am also very much enjoying the project itself. My rocks, particularly as seen through the microscope in thin section, are pretty. They are pretty because of the changes to the mineralogy as a result of their metamorphism. My project seeks to understand those changes by using the chemical composition of the minerals to determine the pressure and temperature at which they must have formed, and then to use that pressure and temperature to tell a story—what happened to that mud to bring about its current beauty?
To do this I get to play with spreadsheets and graphs. I get to run computer models which take input and convert it to data from which I can make more spreadsheets and graphs. And you know what? I like playing with spreadsheets and graphs! It is actually fun to compare sets of data in a graphical format and see how they are the same, or how they are different, and to seek out patterns. I enjoy this so much that one of my biggest distractions from my project is keeping track of my personal data. To help keep me on track with the uni work I track how many hours a day I spend on various activities, so when I’m not playing with my uni data making graphs and looking for answers to questions, I often play with personal data, making graphs and looking for answers to questions. How many hours a week do I spend exercising? Doing e-mail/blogs/social networking? Can I make the graph change in the direction I want it to by changing my activities?
Enjoying the processes and day-to-day tasks required of my project helps keep me enthused. However, as I explained to my friend, one of the biggest reasons I’m still enjoying my PhD project is that there simply hasn’t been enough time elapsed for me to be sick of it yet. Because my goal when I first enrolled in University all those years ago was “to be a student forever” an entire decade elapsed while I was an undergraduate taking classes full-time in anything and everything which sounded interesting. When I did my Master’s degree four years slipped by between enrolling in the first class and handing in the thesis. But here in Australia the university system seems to think that a PhD is a short term project. They give students 3 years in which to complete their projects (note: no classes are taken—this is three years of pure research), and if you can show good progress (and demonstrate that any delays are due to circumstances beyond your control) it is possible to apply for an extension for an additional six months. After that your funding is cut off and you are on your own. So, here I am in that final, extra, six months of my project, not sick of it yet, still enjoying the work, and content to be working away. Speaking of which, time to get back to it…

eThe theme that is currently spreading its branches across the geoblog sphere is “trees”. My field area for my Master’s project was in the Brooks Range, Alaska, where there was 97% outcrop, but no trees. However, I was more than a bit amused by this sign, posted along the Dalton Highway, which runs between Fairbanks and the North Slope of Alaska, pointing out that this is the furthest north tree along that route, and admonishing us to not cut it down. It has been more than a decade since I was up that way, I wonder if the tree and its sign are still there?

Some people are motivated by financial gain; they chose their uni course based on the question “will this get me a good job when I am done?” and race through their classes with the end goal fixed ever in their thoughts. These people tend to be successful in their chosen fields, if “success” is measured in their local currency. But are they happy?
Other people are goal-oriented in all aspects of their lives, and financial considerations are only a component. One of my sisters is a good example of this sort. When she was young she struggled, as many do, to lose weight, or to keep it off once she lost it. Then she started running. These days she runs the occasional marathon. For her the goal of the upcoming marathon is what drives her daily fitness routine. She understands just what she needs to do each day to prepare her body for the upcoming event, and she does it. However, after one marathon is over, and before she schedules the next, she finds that it is easy to cut back on her fitness regime because there is not a goal towards which she is striving. Needless to say, for her, another race of some sort, even if not a full marathon, gets added to her calendar fairly often, so that she has the impetus to keep pushing herself.
I, on the other hand, am a process oriented person. To me the most important thing in life is the enjoyment of life. Rather than focusing upon end goals, I focus upon enjoying what I am doing at the moment, and choose to do things which I will enjoy. This was a large factor in my extended time as an undergraduate student. Because I wasn’t focused upon a long-term goal such as “what sort of job will this get me”, or “will this lead to fame” I focused upon “what will I enjoy learning this semester?” As a result, I didn’t complain about my homework the way some of my classmates did. They were focused on the end goal, and saw the work as an obstacle to be overcome on their race to the finish line. I saw each assignment as a tool for learning, now, and enjoyed the process of the assignment. This doesn’t mean that I always did all of my assignments. Well do I remember the semester I took calculus, physics, and structural geology in the same semester! Calculus had assignments which needed to be turned in daily, structure had assignments which needed to be turned in twice a week, and physics had “suggested homework” which would be “counted” only if our grade from the exams was “borderline”, in which case the homework could push it up if done well, or pull it down if done poorly or not at all. There being only so many hours in a day, and life holding more of interest to a student than course work, the physics homework didn’t often get done as I focused upon getting everything turned in for the other two. As I result I only managed to pull a “C+” for the physics class. However, I have often thought that it might be nice to go back and take the class again when I didn’t have so many other demands upon my time, because, actually, the story problems are kind of fun.
I have been using the program suite Perplex to do “garnet isopleth thermobarometery” as part of my PhD project. This program uses the command prompt as the user-interface into which one enters answers to questions before it does the calculations. I have been using this program on a very regular basis, for a couple of years now. Very early on I figured out that one does not have to wait for it to actually ask the next question before answering it, and for those calculations which I perform over and over for a variety of different samples I soon memorized the sequence of questions/answers so that I could save time by simply typing in the sequence of key strokes needed and thereby get to the part where it does the calculations sooner. However, there were occasions wherein I’d hit an incorrect key, and then I’d have to start the sequence over again. Now, that my project is nearing the end, and I’m meant to be only writing up the thesis (but, of course, I keep doing an occasional bit of calculations too; I just can’t help myself!) I have finally stumbled upon A Better Way (TM). Instead of answering the questions each time I do the calculations, I’ve set up a Word document into which I’ve typed all the key strokes needed for each of the tasks I do, starting with typing the name of the program. Now, instead of typing:
werami
in
2
8
Gt(HP)
1
2 1
4
2 1 5 1 7 1 8 1
n
n
100 100
N
0
pscontor
cpl
n
n
y
every time I wish for it to calculate the isopleths for the pyrope end-member of garnet, I simply click on the heading “XPrp” in the word document, copy, and paste the lot of it into the command prompt. I then enter only the three numbers needed to answer the final question (and which will be different for every sample) and I’m ready to import the graph into CorelDraw and see how it looks. I have these set up for all four garnet end-members, and an additional sequence for just the “pscontor” portion of the process, because I create two graphs for each end member—one showing all of the isopleths in the range of the graph using a 0.01 contour interval, and one showing only the one corresponding to the composition I measured in my garnet core.
It is truly amazing how much easier this process is since it occurred to me to set up this time-saving device! The wonder is that it took me so long of doing this before I came up with the idea. How many of you stumbled upon a brilliant way to save yourself much time/energy/frustration for a task you have performed 1000’s of times before? Or does everyone else think of these things within the first half a dozen times they repeat the task?
Last week I was introduced to the joys of separating zircon crystals from their host rock so that they can be analyzed with a Laser-ICPMS to determine how old they are (why we’d want to know that may well be the topic of another post one of these days).
I accomplished the first two easiest steps the week before:
(1) Crush rock into small bits with a hydraulic crusher
(2) Put small bits into the ring-mill for five seconds to make sand
On Friday I was taught how to do the next steps. The next few were also reasonably easy:
(3) Put sand into a plastic pan with ridges on one side, add water, shake, and pour off muddy water. Repeat as many times as needed to separate the mud from the sand and wash the mud away.
(4) Add more water, using a back and forth motion, start washing out the lighter weight bits of sand. The zircons, being heavy for their size, sink to the bottom of the pan with a few other heavy minerals. Repeat this step till most of the sand has been washed away, being careful not to disturb the area at the bottom of the pan where the heavy stuff is collecting. (Note: this process is done over a tub, so that the sand is collected, and *not* washed down the sink! Not only is this better for the plumbing, but if accidents happen and you wash away everything, you can start over with step three, and not have to go crush a new bit of rock. This can be very important, if the sample comes from *A Long Way Away* or you have *A Limited Suply*.)
(5) Now that there is just a little (~ 2 tablespoons worth) of sand left (of the ~2 cups of starting material) carefully submerge the pan into some clear water and tilt and shake to get most of the rest of the large, light weight, grains to separate out from the tiny, heavy, grains.
(6) Carefully pour the tiny bit of remaining sand into the tiny glass plate (~ 5 cm wide) and use the same sort of panning technique as you've been using, only scaled down, to make the heavy grains sink to the bottom, and wash away the last of the light weight grains.
(7) Check it, using a microscope--yup, some of the remaining grains are zircon! You can tell because of the bright colours it has due to birefringence under the crossed polar lenses of the microscope. (See: a particularly stunning example of these sorts of colours.)
(8) Set the glass plate into the oven to dry for half an hour
(9) Carefully, with a very, very clean brush, put the remaining sand (about 1/4 teaspoon worth) onto a sheet of paper. Set another sheet of paper around the outside of a magnet, and pass it over the sand at a distance of ~1.5 cm to draw off anything which is strongly magnetic
(10) Remove the paper from the magnet, set aside the grains thus collected, and put clean paper on the magnet. This time pass it over the sand just above the grains, to draw off the moderately magnetic stuff.
(11) Remove the paper from the magnet, set aside the grains thus collected, and put clean paper on the magnet. This time actually touch the sand with it, to draw off everything that is weakly magnetic. This leaves you with a *very* tiny pile of very tiny grains of zircon and anything else in your sample which is small enough, heavy enough, and non-magnetic enough to have survived the cleaning ritual.
(12) Prepare the zircon mount by cleaning two glass plates. Put a sheet of special double-sided tape onto one of them, remove the cover-paper, then set the ring-mould on that and trace a circle onto the tape, and add lines bisecting the circle at right angles to one another to mark the center of the circle.
Now the truly difficult part begins:
(13) Carefully sprinkle a small amount of the zircon containing sand onto the plain glass plate and look at it under the microscope set up with crossed polars so that they zircons can be distinguished from the non-zircons. The non-zircons in this sand are either dark or white in crossed polarized light, not brightly coloured like in the link above.
(14) using a clean, specially prepared paint brush, which has most of its bristles cut off to tiny nubs, and one single hair which sticks out from the rest by 3 or 4 mm, carefully pick up one zircon at a time from the clean glass plate and transfer it to the center region of the tape-covered glass plate.
That *sounds* ever so much easier than it is! First of all, the microscope with which we are looking at the zircons on the clean glass plate is a standard one, which means what you see through the scope is both upside down and backwards. It is also needful to use the 20-times magnification lens to be able to see the zircons, since they are so tiny. This makes it difficult to even get that single hair into the field of view in the first place, and it is ever so much harder to actually move it the direction it needs to go to touch the zircon grain once you've found it. In addition, the thing which makes the part about "pick up" the crystal possible is either static electricity (rub the brush against your hair for a bit) or saliva (lick the brush)--either of which is a limited-time-only phenomena--if you take too long getting that hair into place, the grain isn't going to stick to it!
I soon found out that since I am not practiced at this skill I had a choice. I could *either* touch the zircon at which I was aiming, *or* I could pick up one (or often, many) random grain(s) with the hair. I could not manage both at once! So I contented myself with aiming at specific zircons, picking up grains of *something*, and transferring them over to the tape-covered glass plate, and trying again.
Anyone else out there in the geoblog sphere have any experience with this? Would such a thing be easier?
At least I had a good idea of what papers I had copies of, and in what format. I use EndNote to generate a list of papers cited within a document and keep my list of papers I’ve seen organized. I set up extra fields in EndNote just to keep track of my own filing system. One I call "label" into which I type a short description of the general topic (e.g. "geothermobarometry" or "crystallization"), which is also the name of the folder in which the paper is filed (if I have it in pdf format). Then, if I am looking for a paper on a specific topic, I can sort the full list in EndNote and look at the list of just the papers on that topic. This makes it much easier to find a specific paper than if I needed to look through the full list (344 references in the list so far!). I've also got a field named "format/where" in which I record if I have that particular paper in pdf, or I have a paper copy, or I checked it out from the library, or it is in the department thesis cabinet collection, or if I borrowed it from my advisor and have since returned it. This makes it simple to find papers or books again if I need them. However, I eventually found that knowing where to find a paper isn’t always good enough.
Two years into my project I was conversing with one of my friends about a 100-a-day skills challenge wherein the participants practice 100 repetitions of their chosen skill a day (usually physical skills, such as juggling, or dance steps, or whatever). The goal being to see how many days in a row one can manage, and see how much the skill improves whilst doing it. Thinking of that challenge I decided to apply a variant of it and challenged myself to read something from the geologic literature every day. 100 being too small a number where reading is concerned, I settled upon "1,000 words a day" (or roughly the equivalent of reading for abstracts) as my goal. And promptly set up a spreadsheet to track the days, what I read each day, and if I had any comments to make on the reading. Initially I only recorded the author name and year of publication, but after a bit of time I started also recording the title of the paper (or book) and the name of the journal in which it was published. However, other than those comments, I still wasn't really taking notes.
Sometime more recently one of my friends persuaded me to obtain a program designed to help one organize their "to-do" list. Realizing that I'd been downloading more papers "to read later" than I was actually reading, I begin a category in that program called "things to read" and started making a note there whenever I downloaded a new paper. Sure, that information was also in the spreadsheet recording my "1000 words a day", where the "comment" would say something like "downloaded a copy to read later", but I wasn’t actually looking back into the comments field of the spreadsheet. Creating a single list of everything I’ve obtained that I haven’t read yet made it easer to figure out what I should read next. Months elapsed before I realized that when I added a new paper to the list, I should also use the "notes" field to record *why* I'd downloaded it. Did I find it while doing a search for a specific subject? Was it referenced in another paper and I thought I should follow up on it? Did my advisor give it to me to read?
I'm now working on a part of my thesis wherein I need to talk about *why* I chose certain methods to do certain tasks. This means that I need to make reference to papers written by other geologists who chose similar methods, or to papers which used a different method and explain why their technique won't work for me. So now, I am actively taking notes as I look through the list of papers on the general topic, trying to find those which address the specific issue upon which I'm currently writing. As I find them, I type (or, when possible, copy-paste—how much easier a scholar’s life is in the modern age of papers published as searchable pdf files!) quotes into a file to sort out later, once I’ve finished the collection part of this minor literature search. However, in addition to putting these quotes into a single file, I am also copying them into that scheduling program in the “notes” section associated with the paper (most of which I can move to the “papers read” folder at this point), so that I still have them later, if I ever need to look such things up again.
All of these little techniques to keep track of what I’m reading has really paid off, and, so long as I manage to continue them throughout my career, will make the process of keeping current with the literature, and knowing what sources to cite when writing my own papers ever so much easier. I only wish I had thought of all of them sooner, so that I had better records from the first part of my project as well!
PS: for my 1000-words-a-day challenge, I keep track of the number of consecutive days I meet the goal and read 1000 words or more (often much more!) from the geologic literature. Occasionally I forget, and then I have to start my count over. In the past 455 days I have forgotten on eight separate occasions. My current count is 93 days in a row, which is my second-highest count yet (my record is 112 consecutive days, and my worst was only 7 days before I got distracted and forgot a day). How many of you would be able to beat my record? How many would want to thus challenge themselves?


There are a variety of techniques used to determine the temperature and pressure at which a group of metamorphic minerals grew. All of them have been built up over the decades by dedicated scientists who combine information from the study of thermodynamics and various experiments wherein real minerals have been made to grow in laboratory conditions. The one I have been using involves a suite of computer programs, which, if given the composition of the rock sample, will plot a diagram showing all of the possible combinations of minerals which grow from those ingredients at any given temperature and pressure. If all of the minerals present have uniform compositions, then it is a simple matter of comparing the list of minerals that are present with the list of minerals which should be present and thereby get a good guess as to the temperature and pressure at which they grew (how good will depend on if the "field" for that particular set of minerals is a large or small one).
However, if there are minerals which are "zoned" (their composition changes from the center to the rim), it complicates things. You see, for this technique to work, all of the minerals have to be in “equilibrium”, which means that the chemical reactions which make them have to have “gone to completion”. An entire zoned mineral, by definition, can’t all be in equilibrium with everything else present, but it is possible for the outermost bit of it to be in equilibrium with everything else present, and the inner portion to be “frozen” and no longer participating in the chemical reactions which are taking place outside of it. When this happens, the “bulk composition” of the wherein the chemical reactions are happening is constantly changing as some of the ingredients get “frozen” in the center of the zoned crystal. In such a case if you know the composition of the entire rock sample these diagrams only tell you what minerals could have been present way back when that zoned mineral first started growing, which list may or may not bear any relationship to the ones which are present now.
So, how can you read the diagram when there are zoned minerals present? You can’t tell what minerals were there at the time your zoned mineral first started growing, because as that mineral grew it subtracted some of ingredients from the surrounding rock, and “froze” them into its “core”. This process caused the remaining list of ingredients present to be sufficiently changed that the list of possible minerals present at any given temperature and pressure also changes. This is not unlike comparing the list of what you might be able to make for dinner on any given evening without going grocery shopping. They day you first stock the house up with food the list of meals you might make from the ingredients on hand will be much larger than it will be a week or two later (if you don’t go food shopping in between) and have been using up some of your ingredients in the meanwhile.
So the “trick” I use is to consider my zoned mineral (in this case, garnet) as being made up of proportions of four specific ingredients. Just as different cake recipes might call for differing amounts of flour, butter, eggs, and sugar, and still be a cake, so a garnet will have differing amounts of iron (Fe), magnesium (Mg), calcium (Ca), and manganese (Mn). (These elements, being of similar size, all manage to fit into the same slot in the crystal structure.) How much of each is incorporated into the growing garnet at any given time will depend both upon the ingredients available and the temperature and pressure at which the garnet is growing. Therefore if we make a diagram which shows the expected changes in quantity of each of those four ingredients in garnet (at different temperatures and pressures) it is possible to find the spot on the diagram which corresponds to the garnet being studied.
I do this by measuring the composition of my garnet using an electron microprobe and making a note of how much of each of those four ingredients (Fe, Mg, Ca, and Mn) is present in the center of the garnet. I then highlight the lines in the graph corresponding to each of those numbers, and where the four lines intersect marks the temperature and pressure of the first growth of garnet. Often this works, and there is much rejoicing. Sometimes it doesn’t.
I've used the adaptations to this meme suggested by Kim
Use bold to indicate minerals you’ve seen in the wild. Italics is for those seen in laboratories, museums, stores, or other non field locations. And Underline for those you’ve analysed with a microprobe.
50+ minerals everyone should see:
Andalusite
Apatite
Barite
Beryl
Biotite
Calcite
Chromite
Chrysotile
Copper (native)
Cordierite
Corundum
Diamond
Dolomite
Florencite
Galena
Garnet
Glaucophane
Gold (native)
Graphite
Gypsum
Halite
Hematite
Hornblende
Illite
Illmenite
Kaolinite
Kyanite
Lepidolite
Limonite
Magnetite
Molybdenite
Monazite
Muscovite
Nepheline
Olivine
Omphacite
Opal
Perovskite
Plagioclase
Pyrite
Quartz (oops, that wasn’t what I meant to probe!)
Rhodochrosite
Rutile
Sanidine
Sillimanite
Silver (native)
Sphalerite
Staurolite
Sulphur (native)
Talc
Tourmaline
Tremolite
Turquoise
Vermiculite
Willemite
Zeolite
Zircon