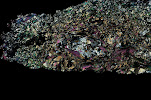
Some time back I received some air photos of the region I am currently working in from one of my colleagues. Last week I discovered that it is possible to easily import those photos into the program Leapfrog and thus see the lay of the land with respect to the locations of the various drill cores. However, he gave me six different photos but I only received corresponding “.tab” files for three of them. It is the data in the .tab files that tells the program how to import the photos—where are they located. Therefore I set myself a quest: work out how to create .tab files for the other photos. Having learned a number of things in the process, I thought I would share them here.
Step One in the process is deciding what points you want to use as markers. Choose a place on the photo that is easily recognizable (like a cross-road intersection). Then open GoogleEarth in one window and the air photo in another (using two monitors at once really helps!). Zoom in to the selected location in google earth, and click on the thumb-tack shaped icon to get a marker. Drag that marker to where you want it, and give the marker a name (such as “T-intersection, upper left corner of Airphoto_a.jpg”), and save the location. You can now look up the latitude and longitude of this point by clicking on it and selecting “properties”.
Step Two is to use an on-line form such as this one (option: “Transverse Mercator Calculator”) to convert the latitude and longitude into the Swedish national grid known as RT-90 (that is the format of the drill hole locations with which I am working—if you are working in a different area you will need to instead convert to the appropriate coordinates for your area).
Step Three is to determine the X-Y coordinates on the photo itself of the selected location. First look up the size of the photo by importing of it into Leapfrog without worrying about the fact that there is not yet a .tab file for it. Then right-click on it to open the properties dialogue box and make note of the photo size (mine happened to be 1404 wide and 940 tall). (It is a good idea to now delete the photo from Leapfrog, since it is not, yet, in the correct spot). Now that you know the photo size that Leapfrog will be using, import the photo in CorelDraw, and change the size of the photo to those values.
Now you are ready to for Step Three itself: Use the “guidelines setup” dialogue box of CorelDraw to create two guidelines, one horizontal, one vertical, both located at zero. Then turn on the “snap to guidelines” feature and set the photo so that the upper left corner of the photo is located at the newly created 0,0 intersection. At this point it is a good idea to “lock” the layer the photo is on so that you do not accidently move it during subsequent measurements.
Now that the photo is properly positioned drag new guidelines onto the photo such that they intersect at the spot you selected in Step One. Re-open the “guidelines setup” dialogue box and edit the position of those lines to the nearest whole number (e.g. 57.3456 becomes “57”) and look at the revised position to be certain you are happy with the location of the intersection of the guidelines.
Step Four: edit a .tab file with the numbers determined in Steps Two and Three.
The files he gave me have this format:
****************************
!table
!version 300
!charset WindowsLatin1
Definition Table
File "airphoto_kriberg_a.jpg"
Type "RASTER"
(X,Y) (A,B) Label "Pt 1",
(X,Y) (A,B) Label "Pt 2",
(X,Y) (A,B) Label "Pt 3"
CoordSys Earth Projection 8, 112, "m", 15.8082777778, 0, 1, 1500000, 0
Units "m"
****************************
Where X and Y are the east and north coordinates of each spot in the RT90 format (Step Two) and A and B are the positions on the photo itself (Step Three). Edit this to have the numbers you determined above, and repeat for two more spots on the photo. Save as a .tab file in the same folder as the photo itself.
Step Five: import into Leapfrog. If you edited the .tab file correctly choosing the “import image” option will open up a dialogue box that shows a circle, a square, and a triangle each superimposed over the photo on one of the three points of interest you selected. If they are in the correct spot click “ok” and your photo is imported. If you don’t get a dialogue box but only an error message one possibility is that you could have introduced a blank space after the coma and before the next number. This is easily solved by deleting that space.
There may well be a simpler way (more automated) way to create .tab files for importing air photos into Leapfrog. If anyone knows of one do please share in a comment. In the meantime writing down what I did will help me remember next time I need to do this.


4 comments:
Nice write-up, I hadn't noticed that the .tab file format was so simple one could create it without the need of Mapinfo or any other GIS software.
I wonder though why didn't you just set the image coordinates directly into Leapfrog's georeferencing dialogue, unless you really want a .tab file associated to the image. If that's the case I'd suggest using free software like QGIS (there are many, many more though), which I'm sure has a similar image georeferencing option, and from there you can export it to a .tif or a .shp file (I don't know about .tab files).
Another non-free but still fairly inexpensive option would be Global Mapper, which I love because it lets you import from and export to a great number of formats, including .tab files.
Have you tried any of these?
Nope, haven't tried any of those, prior to that afternoon I had never imported photos into any program that needed to know where they are on the planet, and as a result have no idea how they do it, or even that it could be done. (Not that I didn't think it could be done, simply that I had never considered the question at all.)
I understand. I'd recommend then skipping the making of a .tab file, and entering the coordinates directly into Leapfrog's georeferencing dialogue. Manually drag the triangle, circle and square to a known point, then enter their coordinates below in the space next to each icon, and you're all set.
That will probably work, too, but one advantage of putting it in the .tab file is that it gives me a handy place to store the locations of the points, so that if I ever need to re-import them into another project they are ready to go at the push of one button, rather than having to drag the circle, square, and triangle into place and then typing in the numbers (and risk entering typos instead).
Post a Comment